There are some desserts that instantly take you back to childhood, and banana pudding is one of them. Maybe it reminds you of family gatherings, summer picnics, or Sunday dinners where someone always brought a big dish layered with vanilla wafers, bananas, and creamy pudding. It is comforting, familiar, and always disappears quickly.
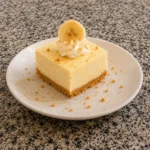
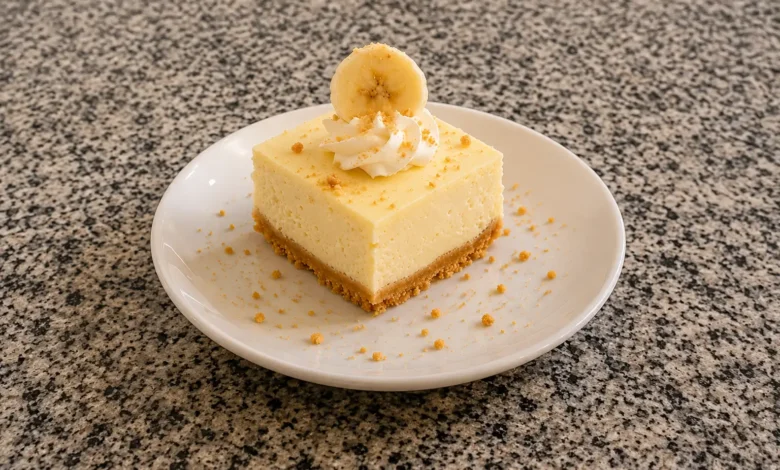
Now imagine combining that nostalgic favorite with rich cheesecake and a buttery graham cracker crust. That’s exactly what you get with Banana Pudding Cheesecake Bars. They offer everything you love about classic banana pudding while adding the smooth, creamy texture of cheesecake in a dessert that’s easy to slice, serve, and share.
Whether you’re baking for a holiday, birthday celebration, potluck, or simply treating yourself after a long week, these cheesecake bars are guaranteed to impress. Better yet, they’re simple enough for beginner bakers while looking like they came straight from a bakery.
Why You’ll Love Banana Pudding Cheesecake Bars
If you’re searching for a dessert that’s creamy, rich, and packed with banana flavor, this recipe checks every box.
Some of the reasons these cheesecake bars have become so popular include:
- Rich cheesecake with classic banana pudding flavor
- Buttery graham cracker crust
- Easy-to-follow recipe
- Perfect for making ahead
- Great for parties and holidays
- Easy to slice and serve
- Freezer-friendly
- Kid-approved and family-friendly
Unlike a traditional cheesecake that requires careful baking and water baths, cheesecake bars are much more forgiving, making them an excellent choice for home bakers of every skill level.
What Are Banana Pudding Cheesecake Bars?
Banana Pudding Cheesecake Bars combine three beloved desserts into one irresistible treat.
You get:
- A buttery graham cracker crust
- Rich cheesecake filling flavored with banana pudding
- Fresh banana slices
- Crunchy vanilla wafer topping
- Light whipped cream garnish
The result is a dessert that’s creamy, smooth, slightly crunchy, and filled with layers of texture in every bite.
Instead of serving banana pudding from a bowl, these bars can be neatly sliced, making them perfect for parties, bake sales, and family gatherings.
Ingredients You’ll Need
The beauty of this recipe is that it uses simple ingredients you can find at nearly any grocery store.
| Ingredient | Purpose |
|---|---|
| Graham cracker crumbs | Creates the buttery crust |
| Brown sugar | Adds sweetness and depth |
| Melted butter | Holds the crust together |
| Cream cheese | Makes the filling rich and creamy |
| Banana cream pudding mix | Adds classic banana flavor |
| Heavy whipping cream | Creates a fluffy texture |
| Vanilla extract | Enhances flavor |
| Almond extract (optional) | Adds extra richness |
| Fresh bananas | Traditional topping |
| Vanilla wafers | Classic crunch |
Optional Toppings
Customize your Banana Pudding Cheesecake Bars with:
- Homemade whipped cream
- Crushed vanilla wafers
- White chocolate drizzle
- Caramel sauce
- Cinnamon
- Chopped pecans
- Toasted coconut
- Fresh strawberries
Kitchen Tools You’ll Need
Having the right tools makes the process much easier.
You’ll need:
- 9×13-inch baking dish
- Electric mixer
- Large mixing bowls
- Rubber spatula
- Measuring cups
- Measuring spoons
- Offset spatula
- Parchment paper
- Food processor (optional)
How to Make Banana Pudding Cheesecake Bars
Making these cheesecake bars is surprisingly simple when broken into manageable steps.
Step 1: Prepare the Crust
Mix the graham cracker crumbs, brown sugar, cinnamon, and melted butter until every crumb is coated.
Press the mixture firmly into the prepared baking dish.
Bake until lightly golden, then allow it to cool completely.
A properly packed crust creates the sturdy base that keeps every slice together.
Step 2: Make the Cheesecake Filling
Beat softened cream cheese until completely smooth.
Slowly mix in:
- Banana pudding mix
- Brown sugar
- Vanilla
- Almond extract
In a separate bowl, whip the heavy cream until stiff peaks form.
Carefully fold the whipped cream into the cream cheese mixture to create a light, fluffy filling.
Avoid overmixing, which can knock out the air and make the filling dense.
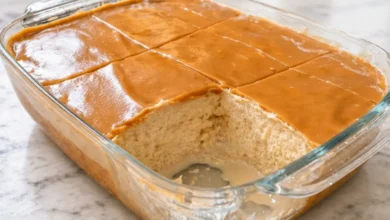
Step 3: Assemble the Bars
Spread the cheesecake mixture evenly over the cooled crust.
Use an offset spatula to smooth the top.
Cover the pan tightly and refrigerate for several hours, although overnight chilling produces the best texture.
Step 4: Add the Toppings
Just before serving, decorate the bars with:
- Fresh banana slices
- Mini vanilla wafers
- Crushed cookies
- Whipped cream
Adding fresh bananas right before serving helps prevent browning.
Tips for Perfect Banana Pudding Cheesecake Bars
Small details make a big difference.
Use Room Temperature Cream Cheese
Cold cream cheese creates lumps that are difficult to remove.
Allow it to sit at room temperature for at least one hour before mixing.
Chill Overnight
Although several hours of chilling works, overnight refrigeration allows the flavors to blend beautifully while creating cleaner slices.
Slice with a Warm Knife
Run your knife under hot water and wipe it clean between each cut.
You’ll get bakery-style slices every time.
Use Fresh Bananas
Choose bananas that are ripe but still firm.
Overripe bananas release extra moisture and become mushy.
Don’t Skip the Whipped Cream
Fresh whipped cream balances the richness of the cheesecake while adding a light finish.
Common Mistakes to Avoid
Even simple desserts can go wrong without a few helpful tips.
Avoid these common mistakes:
- Using cold cream cheese
- Skipping chill time
- Overmixing the filling
- Using bananas that are too ripe
- Cutting before fully chilled
- Using too little butter in the crust
- Forgetting parchment paper
Delicious Variations
One of the best things about Banana Pudding Cheesecake Bars is how easy they are to customize.
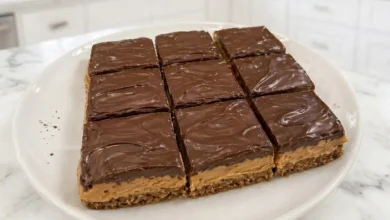
Chocolate Banana Version
Add mini chocolate chips to the filling and drizzle melted chocolate over the top.
Caramel Banana Cheesecake Bars
Finish with warm caramel sauce and chopped pecans.
Peanut Butter Banana
Swirl peanut butter into the cheesecake mixture before chilling.
Oreo Banana Bars
Replace the graham cracker crust with crushed Oreo cookies for a chocolate twist.
No-Bake Version
Skip baking the crust and simply chill it before adding the filling.
How to Store Banana Pudding Cheesecake Bars
Proper storage keeps every bite tasting fresh.
| Storage Method | Time |
|---|---|
| Refrigerator | 4–5 days |
| Freezer | Up to 2 months |
| Room Temperature | Not recommended |
Wrap leftovers tightly with plastic wrap or store them in an airtight container.
If freezing, thaw overnight in the refrigerator before serving.
What to Serve with Banana Pudding Cheesecake Bars
Although these bars are delicious on their own, pairing them with the right drink or dessert can make them even more memorable.
Popular serving ideas include:
- Fresh coffee
- Sweet iced tea
- Vanilla ice cream
- Caramel latte
- Fresh strawberries
- Mixed berries
- Chocolate drizzle
- Salted caramel sauce
Estimated Nutrition
The exact nutritional values depend on the ingredients you use, but here’s a general estimate per serving.
| Nutrient | Approximate Amount |
|---|---|
| Calories | 480 |
| Protein | 7 g |
| Fat | 30 g |
| Carbohydrates | 45 g |
| Sugar | 31 g |
| Fiber | 1 g |
| Sodium | 280 mg |
Frequently Asked Questions
Can I make Banana Pudding Cheesecake Bars ahead of time?
Absolutely. In fact, they’re even better after chilling overnight because the flavors have time to develop and the filling firms up beautifully.
Do Banana Pudding Cheesecake Bars need refrigeration?
Yes. Because they contain cream cheese and whipped cream, they should remain refrigerated until you’re ready to serve them.
Can I freeze Banana Pudding Cheesecake Bars?
Yes. Freeze the bars without fresh banana slices or whipped cream. Wrap them tightly and freeze for up to two months.
Can I use homemade banana pudding?
Yes. Homemade banana pudding can replace instant pudding, although the texture may be slightly softer depending on your recipe.
Why are my Banana Pudding Cheesecake Bars too soft?
They likely haven’t chilled long enough or the whipped cream was overmixed. Refrigerating overnight usually solves the problem.
Can I use low-fat cream cheese?
You can, but full-fat cream cheese creates a richer flavor and firmer texture.
How long do Banana Pudding Cheesecake Bars stay fresh?
When stored properly in the refrigerator, they stay fresh for about five days.
Final Thoughts
Few desserts bring together comfort and elegance as effortlessly as Banana Pudding Cheesecake Bars. They combine the nostalgic flavors of classic banana pudding with the rich creaminess of cheesecake, all resting on a buttery graham cracker crust that adds just the right amount of crunch. Every bite offers a perfect balance of smooth filling, sweet banana flavor, and satisfying texture.
Whether you’re preparing dessert for a holiday table, hosting friends for a backyard barbecue, celebrating a birthday, or simply craving something homemade, these bars are a dependable choice that never disappoints. They’re easy to prepare, simple to customize, and ideal for making ahead, giving you one less thing to worry about on a busy day.
Once you make this recipe, don’t be surprised if it becomes one of the most requested desserts in your home. Try different toppings, experiment with fun variations, and make it your own.
If you enjoyed this recipe, save it for later, share it with family and friends, and leave a comment with your favorite topping or creative twist. Your next favorite dessert might just start with these irresistible Banana Pudding Cheesecake Bars!