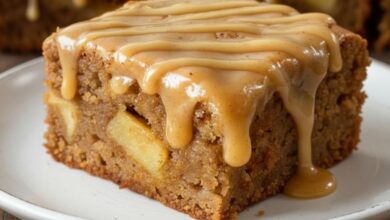
Apple Pie Filling Recipe: A Simple Step-by-Step Guide
There’s something incredibly comforting about the warm, sweet scent of freshly baked apple pie. The apple filling, with its tender fruit, rich sweetness, and just the right balance of spice, is the heart of this classic dessert. Whether you’re preparing for a family holiday or simply want to indulge in a weekend treat, mastering the perfect apple pie filling is essential. In this guide, we’ll walk you through a simple, easy-to-follow apple pie filling recipe that guarantees a filling with perfect flavor and texture every time.
Ingredients You’ll Need for the Perfect Apple Pie Filling
Before we dive into the recipe, let’s talk about the key ingredients that come together to create the most delicious apple pie filling. With just a handful of ingredients, you can transform apples into a perfectly spiced, sweet, and slightly tart filling. Here’s what you’ll need:
| Ingredient | Amount |
|---|---|
| Apples (Granny Smith or Honeycrisp) | 6-7 medium apples |
| Sugar (Granulated) | 3/4 cup |
| Brown Sugar | 1/4 cup |
| Ground Cinnamon | 1 1/2 tsp |
| Ground Nutmeg | 1/4 tsp |
| Lemon Juice | 1 tbsp |
| Cornstarch | 2 tbsp |
| Butter | 2 tbsp |
| Salt | Pinch |
The beauty of this recipe lies in how these ingredients come together to create a balanced filling. The tartness from the apples, the sweetness from the sugar, and the warm spices blend harmoniously to give your pie the right flavor profile. But why each ingredient is important?
- Apples: Choose firm, tart apples like Granny Smith or a mix of tart and sweet varieties like Honeycrisp for a balanced taste.
- Sugar: Granulated sugar sweetens the filling, while brown sugar adds a deep caramel flavor.
- Spices: Cinnamon and nutmeg are the classic spices that complement the apples perfectly, adding warmth and depth.
- Lemon juice: A touch of lemon juice helps balance the sweetness and prevents the apples from browning before cooking.
- Cornstarch: This is your secret weapon for thickening the juices released by the apples during cooking, ensuring that your filling doesn’t turn out runny.
- Butter: Butter adds richness and helps to achieve a silky texture in your pie filling.
Choosing the Best Apples for Pie Filling
One of the most important decisions you’ll make in this recipe is choosing the right apples. Not all apples are created equal when it comes to pie-making. While you might be tempted to grab whatever apples are in season, the variety you choose can make or break the final product.
The Best Apple Varieties for Pie
- Granny Smith: These apples are tart, firm, and hold their shape well when baked. They’re the classic choice for a tart contrast to the sweet filling.
- Honeycrisp: Known for their sweet and slightly tart flavor, Honeycrisp apples have a satisfying crunch and work wonderfully in pie fillings.
- Fuji: If you prefer a sweeter pie, Fuji apples bring a rich, sugary taste while still maintaining a good texture.
- Golden Delicious: These apples are milder and sweeter, making them ideal if you’re looking for a less tart filling.
A Perfect Blend
For the best results, consider using a blend of apples to balance sweetness and tartness. For instance, a mix of Granny Smith and Honeycrisp will give you the perfect combination of flavors and textures.
How to Prepare the Apples for Pie Filling

Once you’ve selected your apples, it’s time to prepare them for the filling. The process is simple, but attention to detail will help you achieve the best possible result.
Step-by-Step Apple Preparation
- Peeling the Apples: While some people enjoy leaving the skins on for texture, peeling the apples is the best choice for a smooth filling. Use a vegetable peeler or paring knife to carefully remove the skin.
- Corning the Apples: Cut the apples in half and remove the core with an apple corer or a knife. You’ll want to make sure you remove all the seeds and tough core pieces.
- Slicing the Apples: Slice the apples evenly so that they cook uniformly. Aim for about 1/4-inch thick slices. The more consistent your slices, the more evenly the filling will cook.
Prevent Browning
As soon as you start slicing the apples, they will begin to brown. To prevent this, toss them with a bit of lemon juice. The acid helps slow down the browning process and keeps your filling looking fresh.
Making the Apple Pie Filling: Step-by-Step
Now that your apples are prepped and ready, let’s move on to the most important part: making the apple pie filling. This simple step-by-step process ensures that your filling turns out perfect every time.
Step 1: Prepare the Apples
In a large mixing bowl, toss your sliced apples with lemon juice. This not only helps prevent browning but also adds a touch of brightness to the flavor.
Step 2: Mix the Dry Ingredients
In a separate bowl, combine the granulated sugar, brown sugar, cinnamon, nutmeg, and salt. These dry ingredients are the base of your pie filling’s flavor. Stir them together until they’re evenly mixed.
Step 3: Coat the Apples
Sprinkle the dry mixture over the apples and toss them gently. Make sure every slice of apple is coated in the sugar-spice mixture. This will ensure an even distribution of flavors throughout the filling.
Step 4: Thicken the Filling
Sprinkle cornstarch over the apple mixture and toss again. The cornstarch will help thicken the juices released by the apples during cooking, ensuring a thicker, more stable filling. If you prefer a thicker consistency, feel free to add more cornstarch (up to 3 tablespoons).
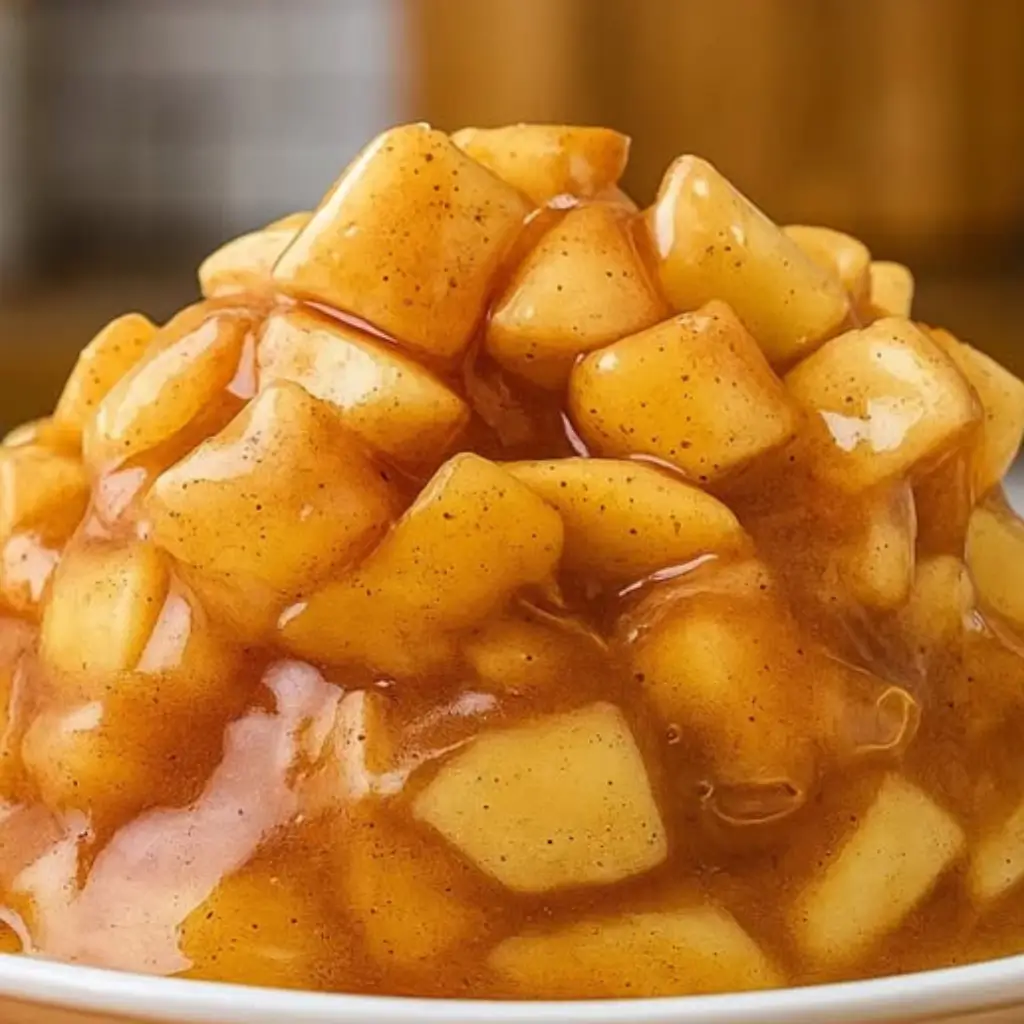
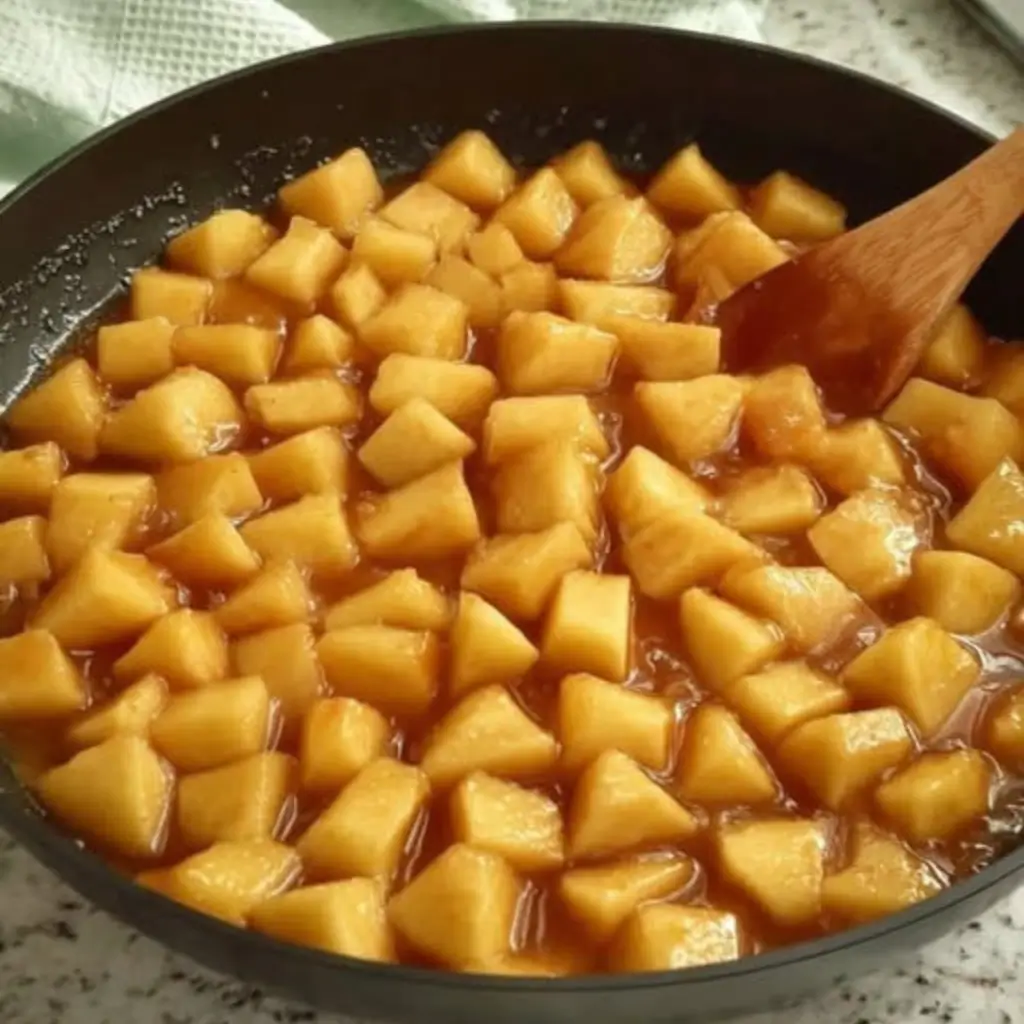
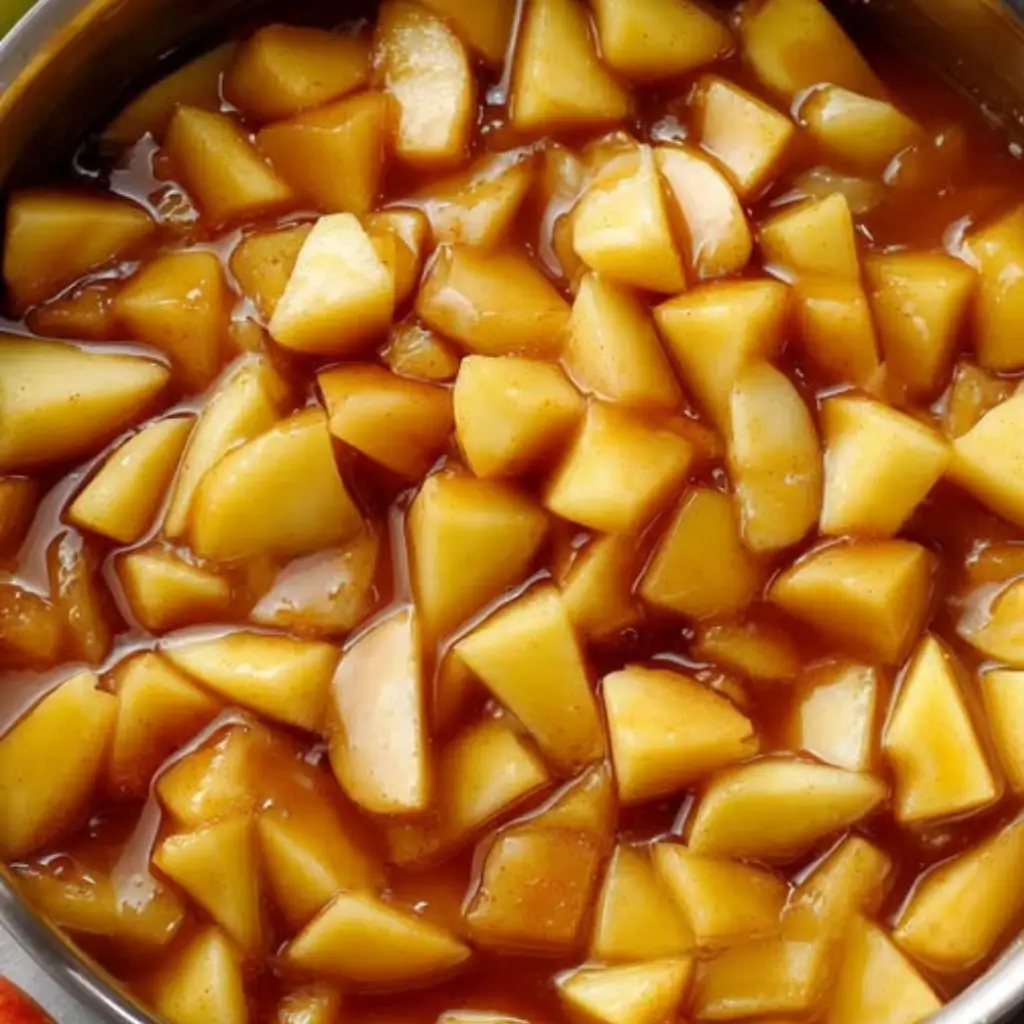
Step 5: Cook the Filling
In a large saucepan, melt the butter over medium heat. Once melted, add the apple mixture. Stir the apples frequently as they cook, allowing them to soften and release their juices. Cook for about 10 minutes until the filling thickens and becomes syrupy.
Step 6: Cool the Filling
Once your apple pie filling has thickened to your liking, remove it from the heat and allow it to cool to room temperature. It’s crucial that the filling is cool before you add it to your pie crust. Warm filling can cause the crust to become soggy, so patience here is key.
If you’re looking to try another delicious dessert, check out this Pecan Pie Cheesecake: The Ultimate Dessert Mashup for a unique twist on traditional pies.
Tips for the Best Apple Pie Filling
While this recipe is straightforward, there are a few tips that can help you achieve the best possible apple pie filling every time:
- Mix apple varieties: For depth of flavor, use a mix of tart and sweet apples.
- Don’t overcook: Keep an eye on the cooking process to avoid mushy apples. The goal is to soften the apples, not to break them down completely.
- Cool before using: Let your filling cool to room temperature before adding it to your pie crust. This prevents a soggy bottom.
For more tips on creating the perfect pie crust to pair with your apple pie filling, check out this helpful guide on how to make a flaky pie crust.
How to Use Your Apple Pie Filling
Once your apple pie filling is ready, it’s time to create the perfect apple pie! Here’s how you can use it:
- Prepare Your Pie Crust: If you’re using a homemade pie crust, roll it out and line your pie dish. If you’re using a store-bought crust, simply place it in the pie dish.
- Add the Filling: Spoon the cooled apple pie filling into the prepared crust. Make sure to spread it evenly to avoid uneven baking.
- Top with Crust: If you prefer a traditional top crust, place it over the filled pie and seal the edges. You can also create a lattice top for a more decorative look.
- Bake: Bake the pie according to your pie crust recipe’s instructions. Typically, a 375°F (190°C) oven will do the trick, but follow the specific instructions for your crust and pie.
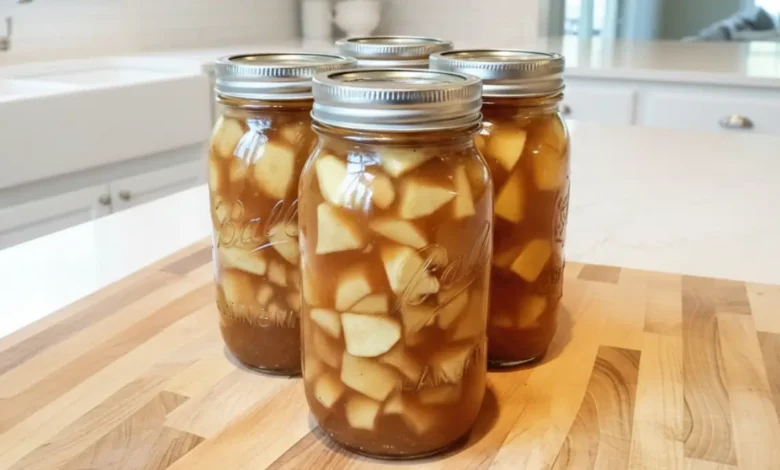
Storing and Freezing Apple Pie Filling
If you make extra apple pie filling, don’t worry! You can store or freeze it for later use.
Storing the Filling
Once the filling is cooled, transfer it to an airtight container and refrigerate. It will keep for up to 3 days in the fridge, so feel free to prepare it in advance.
Freezing the Filling
If you want to store the filling for an extended period, freezing is the way to go. Place the cooled filling in a freezer-safe bag or container, ensuring there’s as little air as possible. It can be stored in the freezer for up to 3 months. When you’re ready to use it, simply thaw the filling in the refrigerator overnight before using it in a pie.
For another easy and delicious pie-inspired dessert, be sure to try this Pecan Pie Dump Cake for a quick, crowd-pleasing treat.
FAQs About Apple Pie Filling Recipe
Can I Use Pre-Made Apple Pie Filling?
While pre-made fillings can be convenient, making your own apple pie filling from scratch allows you to control the sweetness, tartness, and thickness. It’s the perfect way to elevate your apple pie!
How Do I Prevent My Apple Pie Filling From Being Too Runny?
To avoid a runny filling, use cornstarch or flour to thicken the juices released by the apples. Make sure to cook the filling until it thickens properly before using it in your pie.
Can I Make the Apple Pie Filling Ahead of Time?
Yes, you can prepare the apple pie filling a day or two ahead of time. Just store it in the refrigerator until you’re ready to use it.
What Is the Best Apple Pie Filling Recipe for Canning?
For canning, you may need to adjust the sugar and cornstarch levels to ensure a proper consistency that will hold up during the canning process. Always follow a trusted canning recipe for safety.
Conclusion: The Perfect Apple Pie Filling Awaits
You’ve now mastered the art of creating the perfect apple pie filling. With just a few ingredients and simple steps, you can enjoy a delicious, homemade filling that enhances any pie. Whether you make it ahead of time or use it immediately, this apple pie filling is sure to impress. Now, get baking and share your delicious creation with loved ones. Your perfect apple pie is only a few steps away! Happy baking!