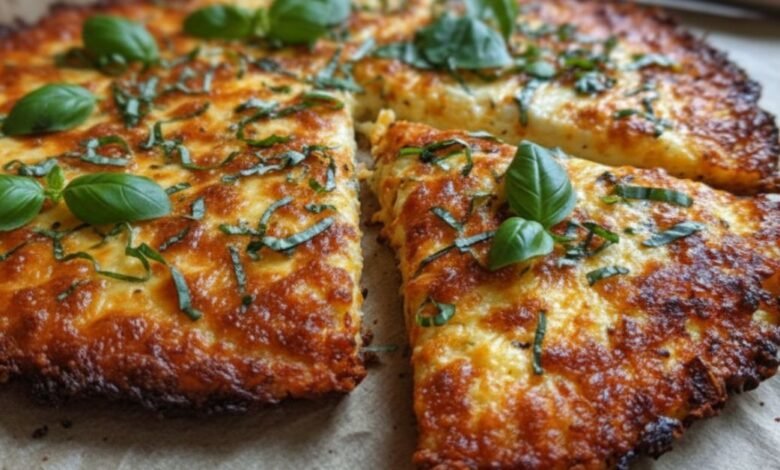
Crispy 2-Ingredient Cottage Cheese Pizza Crust
If you love pizza but want something lighter, higher in protein, or gluten-free without giving up that crispy, satisfying base… this cottage cheese pizza crust is about to become a staple in your kitchen.
It uses just two main ingredients—cottage cheese and eggs—to build a golden, sturdy crust that can hold all your favorite toppings. No flour, no kneading, no yeast, and no waiting around for dough to rise. Just blend, bake, top, and enjoy.
Below is the exact recipe, followed by plenty of tips, topping ideas, and ways to customize it for your own blog readers.
Crispy 2-Ingredient Cottage Cheese Pizza Crust
Ingredients
1 cup cottage cheese (full-fat or 2%)
2 large eggs
1 tsp olive oil (for greasing)
1/4 tsp garlic powder (optional)
1/2 tsp dried oregano (optional)
Instructions
Preheat your oven to 400°F (200°C). Line a baking tray with parchment paper and brush lightly with olive oil.
In a blender or food processor, blend the cottage cheese and eggs until smooth and creamy, about 30 seconds.
Pour the mixture onto the prepared tray. Spread evenly into a round or rectangular shape about 1/4 inch thick.
Sprinkle garlic powder and oregano on top, if using, for added flavor.
Bake the crust for 25–30 minutes until golden and edges lift from the parchment. Let cool slightly before topping.
Add your favorite toppings and return to the oven for 5–10 more minutes until cheese is melted and bubbly.
Notes
Use full-fat cottage cheese for the crispiest texture. Let the crust cool slightly before adding toppings to prevent sogginess. Reheat leftovers in an air fryer or oven to restore crispness. For variations, mix in parmesan or spices like Italian seasoning or red pepper flakes.
Why This Crust Works (With Just 2 Main Ingredients)
You might be wondering: How can cottage cheese and eggs replace traditional dough?
Here’s what’s happening:
- Cottage cheese melts and sets into a firm, cheesy base. As it bakes, the moisture cooks off and the edges become lightly crisp and browned.
- Eggs are the binder and structure. They set in the oven and hold the crust together, acting like the “glue” that keeps the cheese cohesive.
Together, they form a high-protein, naturally gluten-free crust that’s sturdy enough for toppings but still tender when you bite into it.
The olive oil is just for greasing (so nothing sticks), and the garlic powder and oregano are optional flavor upgrades—they season the crust without changing its basic 2‑ingredient nature.
Ingredient Breakdown & Substitution Tips
Let’s look a little deeper at each ingredient so you can explain it clearly to your readers.
Cottage Cheese (Full-Fat or 2%)
- Full-fat cottage cheese gives the best crispiness and flavor.
- 2% works well if you want it slightly lighter but still rich.
- Small curd or large curd both work since you’re blending it smooth anyway.
💡 Tip for your readers: If they’re sensitive to texture and don’t love the curds in cottage cheese, reassure them that blending makes the mixture completely smooth—no lumps in sight.
Eggs
- Eggs give structure and help the crust firm up.
- Using 2 large eggs is important. Less, and the crust might be too soft; more, and it can become a bit too eggy.
Olive Oil (for Greasing)
- This keeps the crust from sticking to the parchment and helps the edges crisp.
- A light brushing is enough—no need to drench the tray.
Garlic Powder & Dried Oregano (Optional but Recommended)
- Garlic powder adds a subtle savory note.
- Oregano gives that familiar pizza-parlor aroma.
- Since they’re sprinkled on top before baking, they season the crust itself, not just the toppings.
Step-by-Step: Getting the Best Possible Crust
Here’s how to walk your readers through the process with extra details and pro-style tips based on the original instructions.
1. Preheat and Prepare Your Tray
Preheat your oven to 400°F (200°C). Line a baking tray with parchment paper and brush lightly with olive oil.
- Make sure the oven is fully preheated before you put the crust in. A hot oven helps it crisp.
- Parchment paper is key for easy removal. If anyone has had crusts stick before, this step (plus the olive oil) makes a huge difference.
2. Blend Until Completely Smooth
In a blender or food processor, blend the cottage cheese and eggs until smooth and creamy, about 30 seconds.
- Tell your readers to scrape down the sides if needed.
- The texture should look like a thick, pourable batter—almost like pancake batter, but slightly thinner.
3. Shape the Crust
Pour the mixture onto the prepared tray. Spread evenly into a round or rectangular shape about 1/4 inch thick.
- A thin crust (about 1/4 inch) is ideal for crispiness.
- They can use the back of a spoon or a spatula to smooth and shape it.
- Rectangular is easiest (like a sheet-pan pizza), but round works too if they want a more classic pizza look.
4. Add Optional Seasonings
Sprinkle garlic powder and oregano on top, if using, for added flavor.
- Suggest sprinkling evenly so each bite has a bit of flavor.
- They can experiment with other dried herbs later (more on that in the Notes section of your article).
5. Bake the Crust Until Golden
Bake the crust for 25–30 minutes until golden and edges lift from the parchment. Let cool slightly before topping.
- The edges should be firm and golden and will naturally start to pull away from the parchment—that’s a great sign that it’s done.
- The center should look set, not jiggly.
- Cooling slightly (even 5–10 minutes) helps it firm up further, so toppings don’t make it soggy.
6. Add Toppings and Finish Baking
Add your favorite toppings and return to the oven for 5–10 more minutes until cheese is melted and bubbly.
- After the first bake, you’re basically just melting toppings and warming everything through.
- Keep an eye on it in the last few minutes: you want bubbly cheese and slightly crisp edges, not overbrowning.
Topping Ideas That Work Beautifully With This Crust
Since the crust itself is made from cottage cheese and eggs, it’s already rich and savory. Here are topping ideas you can suggest:
Classic Pizza Style
- Tomato or pizza sauce
- Shredded mozzarella
- Pepperoni or turkey pepperoni
- Fresh basil after baking
Veggie-Lover’s Pizza
- Tomato sauce or pesto
- Sliced bell peppers
- Red onion
- Mushrooms
- Black olives
- A sprinkle of feta or parmesan
Protein-Packed
- Tomato or white sauce
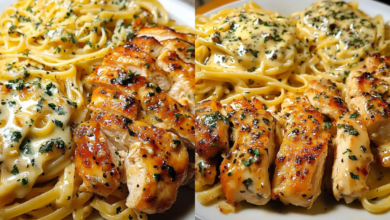
- Grilled chicken
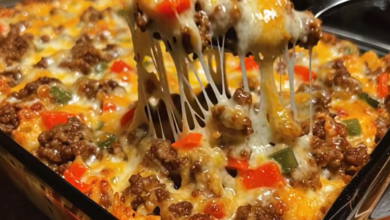
- Turkey sausage or lean ground beef
- A sprinkle of mozzarella and parmesan
Lighter, Fresh Option
- Very light brush of olive oil (instead of sauce)
- Cherry tomatoes, halved
- Spinach or arugula (add after baking)
- A sprinkle of parmesan
- Cracked black pepper
You can remind readers not to overload the crust with too many heavy, wet toppings. A light, even layer is perfect.
Storage, Meal Prep, and Reheating
One of the best parts of this recipe is how well it fits into meal prep.
- Fridge: Store leftover slices in an airtight container for 2–3 days.
- Reheat:
- Air fryer: a few minutes until hot and crisp again.
- Oven: on a baking tray at 350°F (175°C) until warmed through.
- Do not recommend microwaving for crispness; it will soften the crust.
The original notes say it perfectly: Reheat leftovers in an air fryer or oven to restore crispness.
Dietary Notes to Share With Your Readers
This crust is great for several dietary needs:
- Gluten-free: No flour, no gluten-containing ingredients.
- High-protein: Cottage cheese + eggs = a protein-rich base.
- Low-carb friendly: There’s no traditional dough, so it can fit into lower-carb lifestyles, depending on toppings and sauce.
- Kid-friendly: The texture is familiar, and the cheesy flavor is mild.
If your blog leans toward healthy or macro-conscious recipes, you can position this as a lighter alternative to traditional pizza while still feeling indulgent.
Variations & Flavor Boosts (Without Changing the Core Recipe)
You asked to keep the recipe the same, and these ideas still respect that— they’re just optional additions your readers can try:
- Mix parmesan into the batter for a saltier, sharper flavor.
- Sprinkle Italian seasoning or red pepper flakes on top (as your original notes mention).
- Add a pinch of black pepper to the mixture for extra depth.
All of these work within the “Notes” section of your recipe:
For variations, mix in parmesan or spices like Italian seasoning or red pepper flakes.
You can treat these as “bonus ideas” in the blog post, while keeping the printed recipe exactly as written.
FAQ Ideas You Can Include in Your Post
To make the blog article more helpful (and SEO-friendly), here are some Q&A style sections you could incorporate:
Can I make this crust ahead of time?
Yes. Bake the crust fully, let it cool, then store it in the fridge. When ready to eat, add toppings and bake for 5–10 minutes until heated and bubbly.
Can I use low-fat or fat-free cottage cheese?
You can, but for the crispiest texture, full-fat works best—just like your notes say.
Is this crust strong enough to pick up like regular pizza?
Yes, especially if it’s baked until golden and allowed to cool slightly before topping. Thinner crust and moderate toppings will help it hold up well.
Can I freeze it?
You can freeze the baked crust (without toppings) between sheets of parchment. Thaw in the fridge, then top and bake.
Final Thoughts for Your Blog
This Crispy 2-Ingredient Cottage Cheese Pizza Crust is the kind of recipe that makes people say, “Wait… that’s it?” It’s simple enough for a weeknight, light enough for those watching carbs, and comforting enough to satisfy serious pizza cravings.